Your workplace needs more WOW. Get ready for MHR's World of Work 2026
Image

Authentication
Before any calls can be made to the People First APIs the client first needs to obtain authorisation in the form of a People First Access Token. A People First access token is acquired from the 'Inbound Integration' section of the settings tab within the People First Administration menu. Login to People First using your company credentials and then following authentication click the menu icon in the top left-hand corner of the landing page.
Image

In the menu navigate to 'Administration' ➔ 'Settings' ➔ 'Inbound Integration' to arrive at the below.
Image

- Click the plus + symbol next to 'Inbound Integration' in the side menu to bring up 'Create inbound integration' interface
- Enter the application name for which access is required in the 'External application name' field
- Use the drop-down arrow to the right of the 'Grant user roles access to' field to select the roles you would your external application to have permissions for (you would normally want your application to have the maximum allowed then control roles permissions at a personal access token level)
- Tick the checkbox labelled 'Active'
- Click the 'Generate Access Token' button to navigate to the 'Generate Access Token Page'
Image
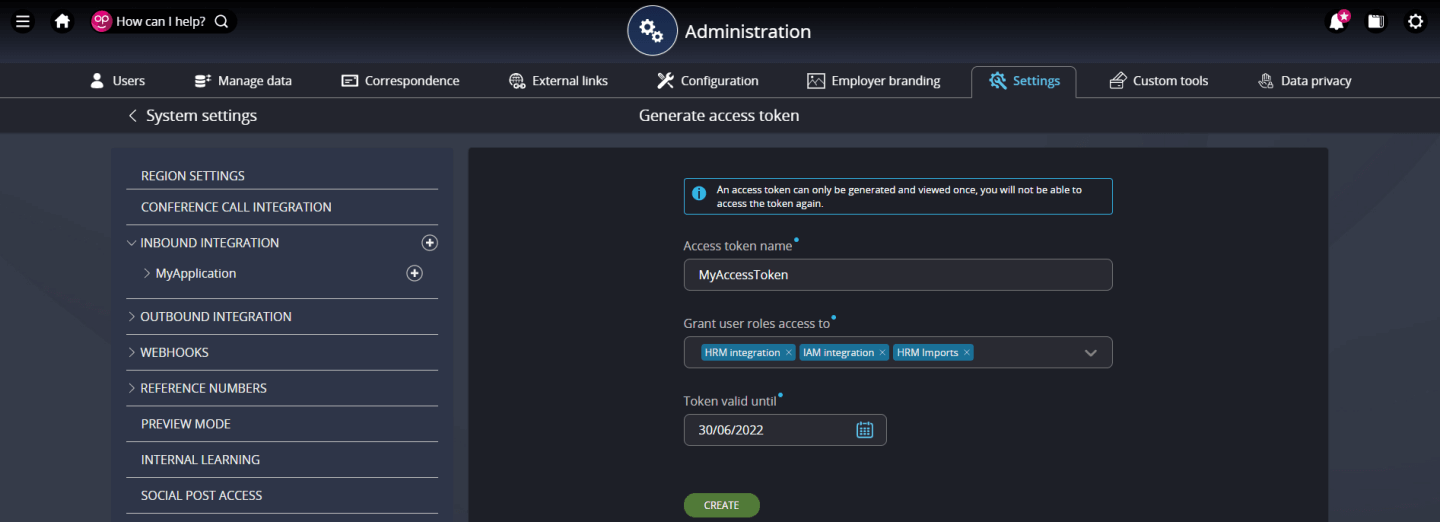
- Enter an access token name in the 'Access token name' field
- Use the drop-down arrow to the right of the 'Grant user roles access to' field to select the roles you would like this particular access token to grant permissions for
- Enter a date in the 'Token valid until' field and then click the 'Create' button.
Image
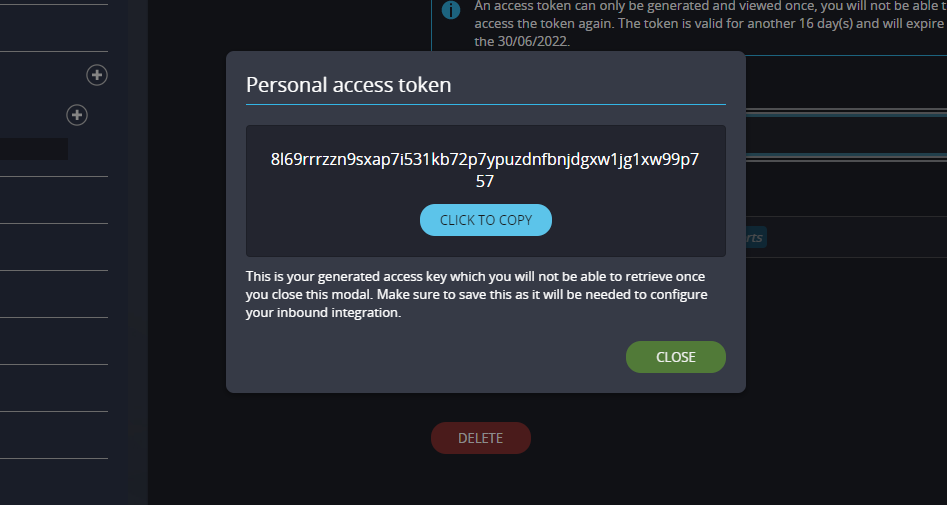
Upon selecting Create, you will be presented with a dialog displaying the generated access token. You will not be able to view the access token once this dialog has been dismissed.
Personal Reference Numbers
While we are in the settings tab of the admin area in People First we are going to set 'Personal Reference' numbers to auto-generate. This will help in a later part of the guide.
Image
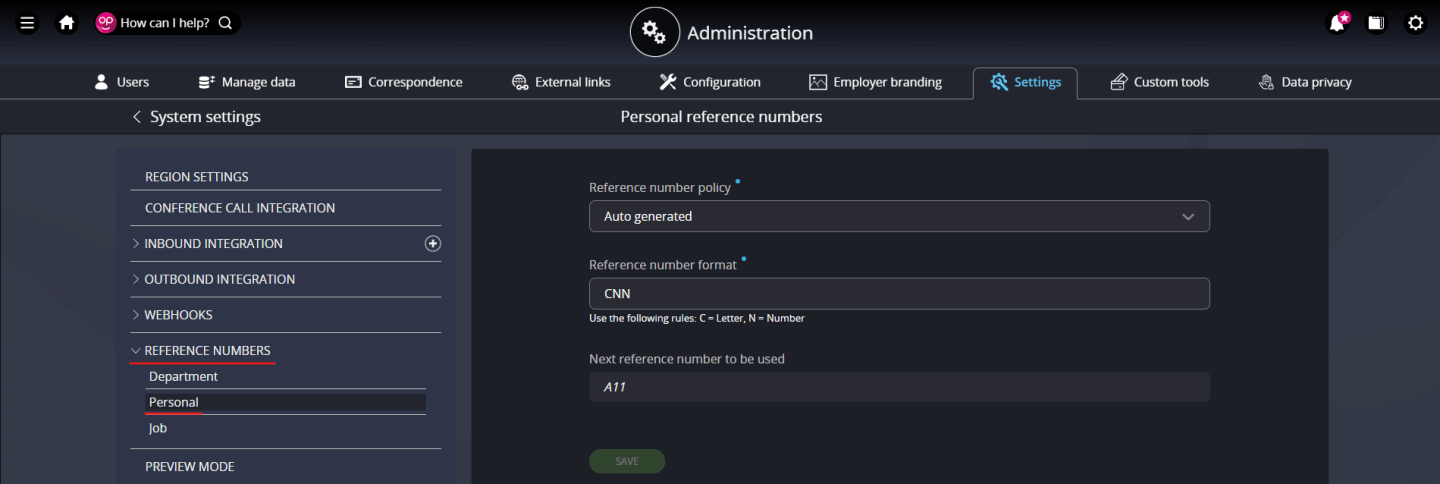
Below 'Inbound Integration' in the 'Settings' side menu click on 'Reference Numbers' to activate its drop-down sub-menu as indicated in the image above. From the drop-down menu select 'Personal' which will bring up the view shown above in the main viewing pane.
- Set the field 'Reference number policy' to 'Auto generated'
- Set the field 'Reference number format' to your desired letter / number combination. For the purposes of the quick start guide this will be 'CNN'
- The last field 'Next reference number to be used' is auto-generated
Personal reference numbers will now be allocated automatically each time a person is created, and will auto-increment for each new person.